Creating an Appointment
Take a phone booking and enter it directly into the system.
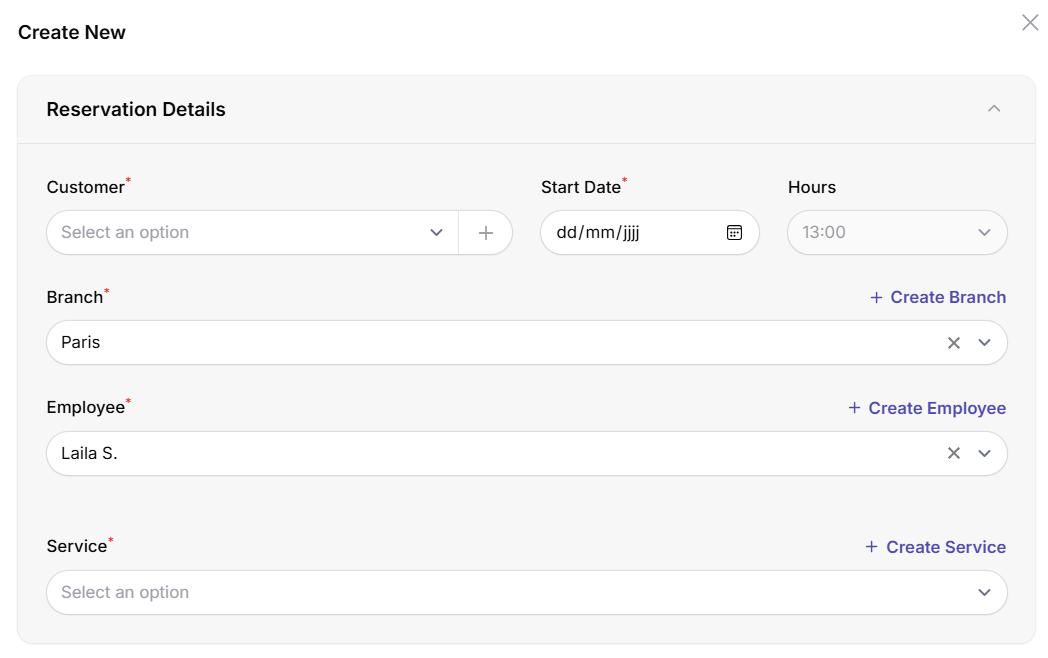
On the Openbeauty platform, appointment management is carried out through a user-friendly, step-by-step process. To create an appointment, first click on ‘Appointments’ → ‘New Appointment’ in the menu, then select an existing customer or add a new one.
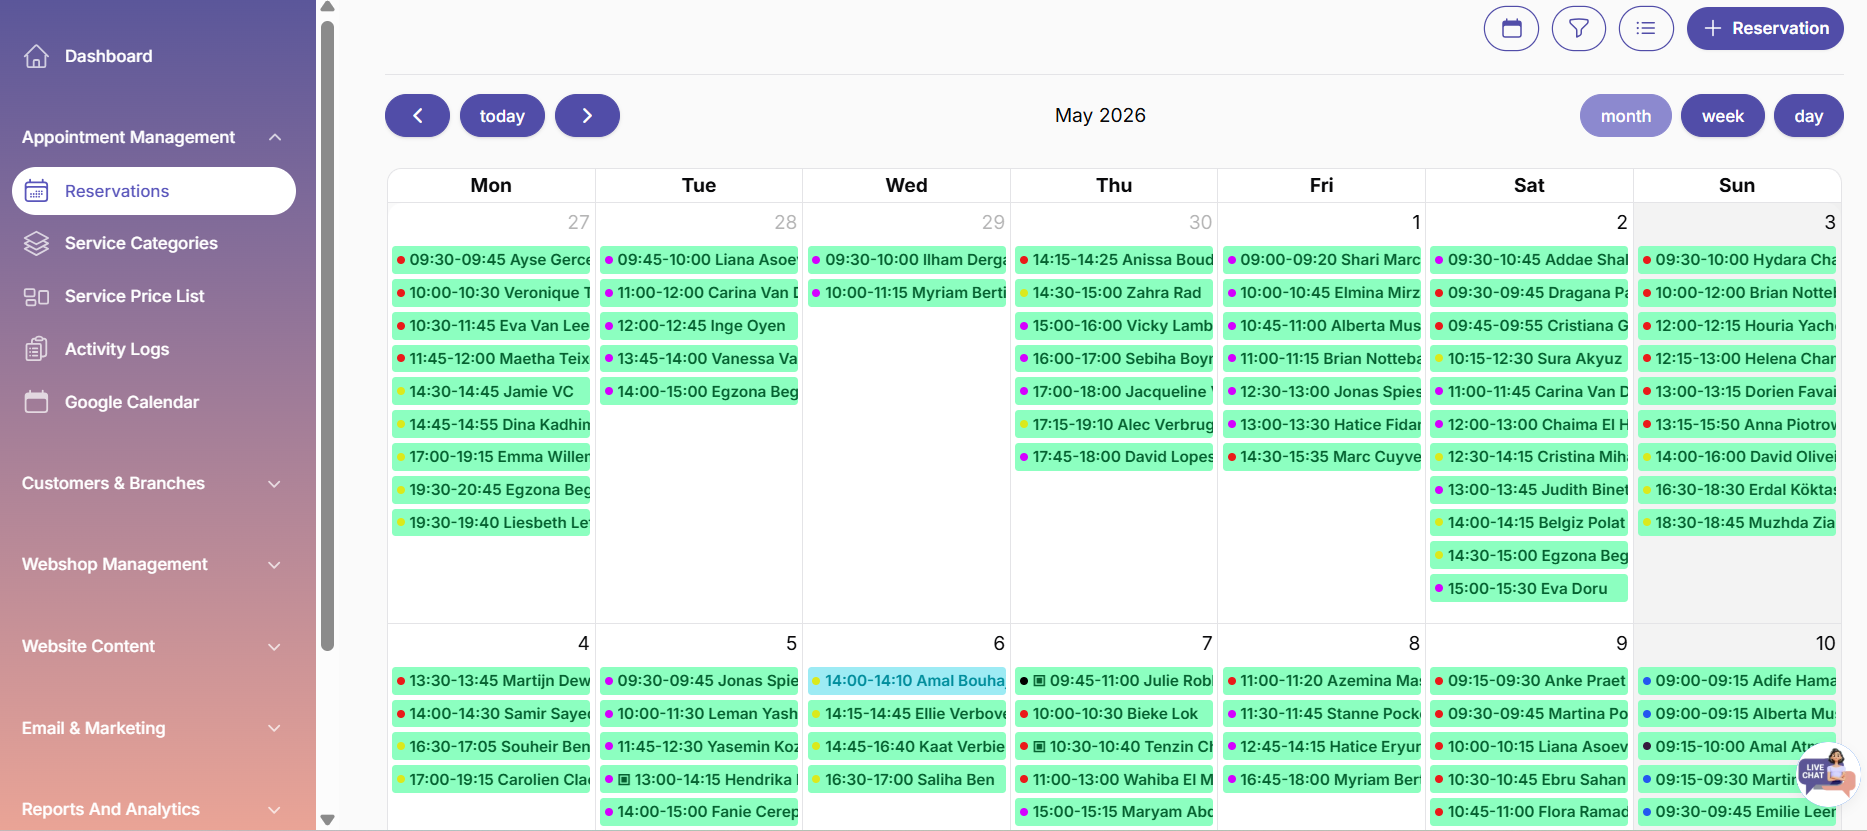
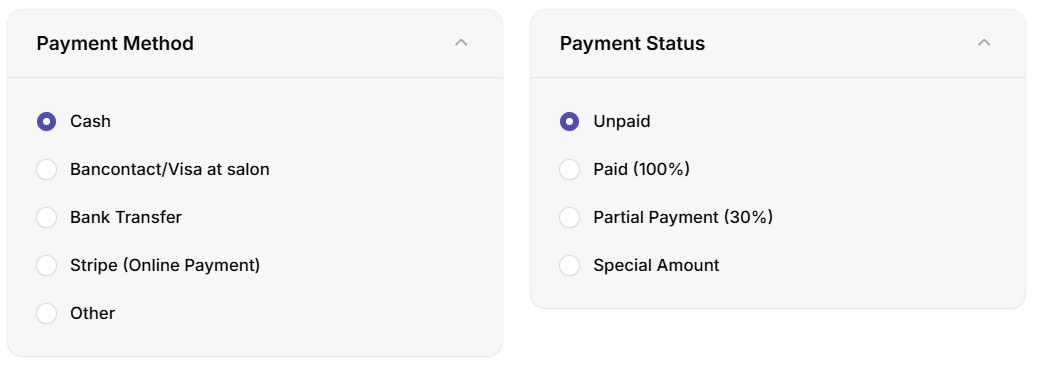
After selecting the service and staff member, set the date and time; the payment method and status (Cash, Bancontact/Visa, Stripe, Paid, Partial Payment, etc.) are added, and if desired, a coupon can be applied and a note can be added.
The Payment Status section is designed to offer customers flexible payment options during the appointment creation process. In this section, you can set the payment method, amount, and status; the system automatically calculates based on the selected amount, simplifying the process. Openbeauty works with four different payment statuses:
|
Betaaltype |
Beschrijving |
|
Unpaid |
Used when the customer will pay later. The system can display unpaid appointments separately. |
|
Paid (100%) |
Marked when the full payment is received in one transaction. The appointment is immediately registered as paid. |
|
Partial Payment (30%) |
Used when the customer pays only a percentage (e.g. 30%). The system automatically calculates the remaining balance and simplifies future collection |
|
Special Amount |
Used for custom pricing outside standard percentages or when a different payment arrangement is required; a manual amount can be entered. |
Thanks to this structure, businesses can offer customers different options such as full payment, partial payment, or post-payment. The system automatically records and reports these payments, making them easy to track. The remaining balance, payment history, and collection process can all be monitored clearly from a single screen.
Once all information has been filled in, click the ‘Save’ button to create the appointment. Managing existing appointments is also very simple: click on an appointment and use the ‘Edit’ or ‘Cancel’ options in the menu that opens, make the necessary changes, and save them to complete the process.